

In Splunk Search Head Installation and Configuration starting with Search head, you can refer it as a Splunk instance which allows user to interact with splunk via graphical user interface. It distributes searches to other indexers (also known as search peers) and does not have any indexes of its own.
Search head can also be grouped in search head cluster which in turn provides high availability and load balancing.
A basic architecture of Splunk is shown below:
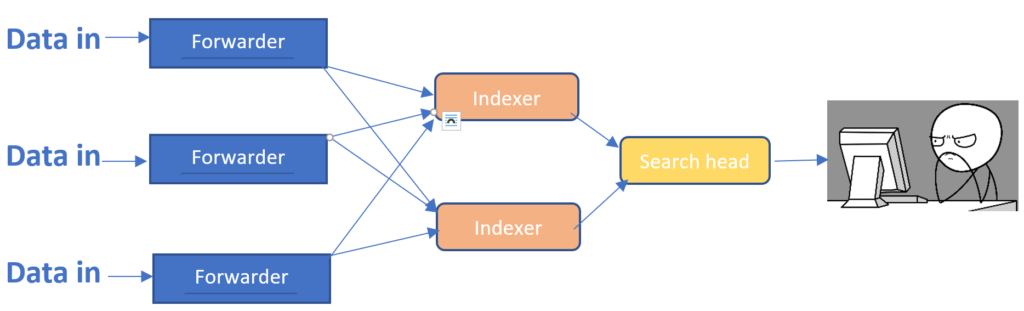
Have a look on the above diagram which represent the data is fed into the forwarder which sends the data to the indexer in the pipeline for indexing/parsing and then onto the search head when user request query for the indexed data. The search head then allows user to perform functions like transforming ,streaming ,creationg reports ,alerts and interactive dashboard on the search head.
Lets have a look on how to configure Search head using various methods available
Take IP of your Splunk instance which you want to configure as Search head to receive data from the Indexer provided Splunk is already installed
Method 1: Using Configuration file editing Method
Step 1: Connect Putty for Search using Username and Password
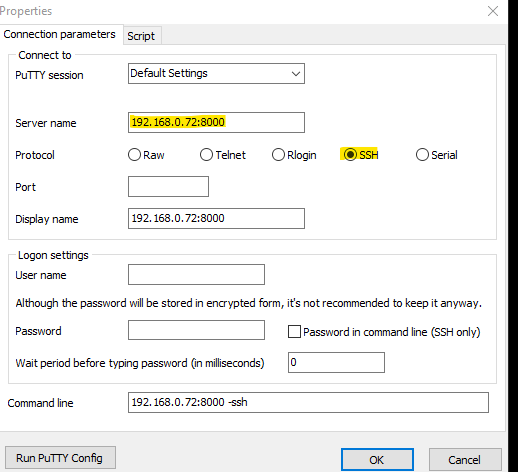
Now login with admin and password which you have used for setting up your VMs

Step 2: Switch to splunk user and put password
➢ sudo su splunk
Step 3: Go to local folder under opt > splunk > etc > system
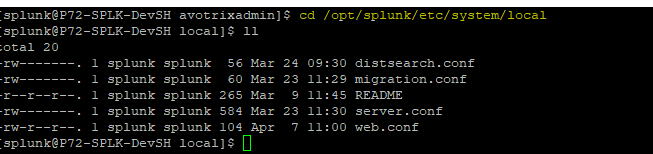
Create or Edit distsearch.conf to add search peers
➢ vi distsearch.conf
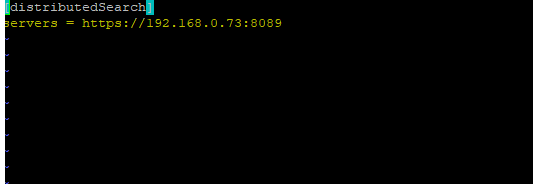
Add given stanza in distsearch.conf.
Add ip of the search peers as servers(192.168.0.73)
Step 4 : Go to system distServerKeys to copy trusted key of search head
under opt > splunk > etc > auth > distServerKeys
➢ cd /opt/splunk/etc/auth/distServerKeys To list the content use ll
➢ llYou can see 2 files private.pem is the private key and trusted.pem is the public key listed in the folder. The above keys are generated the first time you run the splunk .The trusted.pem key is used to estlabish trust between the search heads and the peers (indexers) .

Step 5: Capture data of trusted key of search head and copy it
➢ cat trusted.pem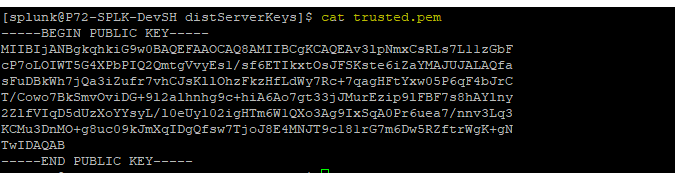
Step 6: Check hostname to search head
➢ hostname
Step 7: Login your indexer by putty switch to Splunk user as required always.
Go to distServerKeys under the folder opt>splunk>etc>auth>distServerKeys
➢ cd /opt/splunk/etc/auth/distServerKeys/
Make a new directory with name of search head hostname, which you copied earlier
➢ mkdir <SH hostname>Step 8: Check new directory permissions set right
➢ chmod<permission rules><hostname>
➢ll
Step 9: Go to your hostname folder
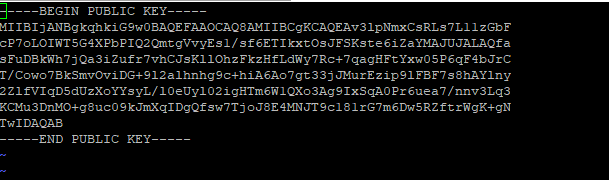
➢ Cd hostnameEdit trusted.pem file in the folder
➢ vi trusted.pemPaste the trusted.pem content you copied from Searchhead and save file
Step10: Restart searchhead using the below command
➢ /opt/splunk/bin/splunk restart. Step 11: Login to Search head UI using the credentials
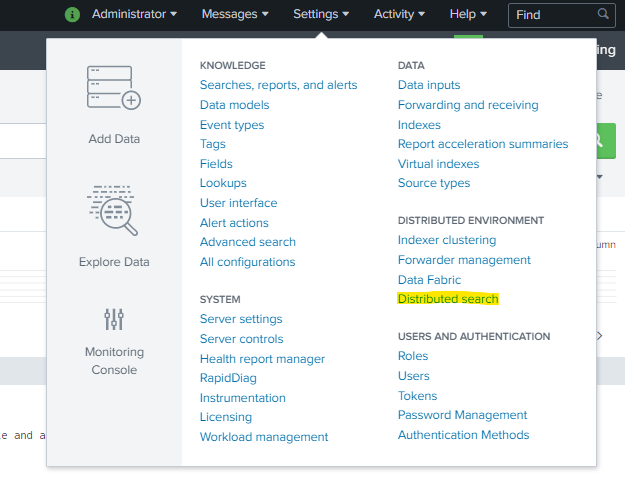
In Ui goto Setting >> distributed search >> search peer

You will see your indexer configured as search peers there.

Method 2: Configuration by UI method
Step 1:
Take IP of your instance which you want to configure as search head provided splunk is already installed
Goto SEARCHHEAD UI https://:8000
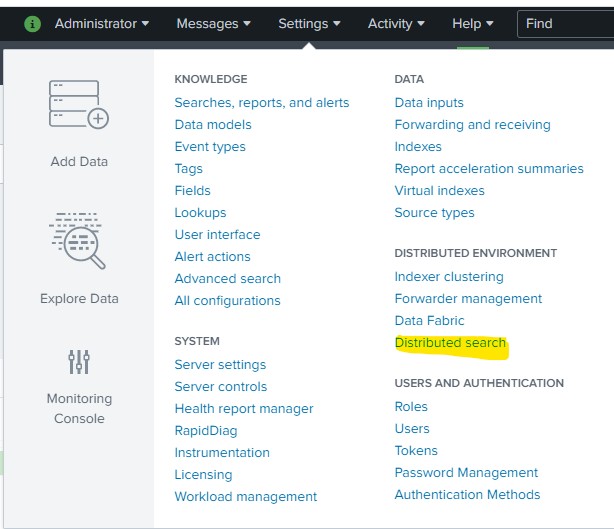
Step 2: Goto Setting>>distributed search>>search peer>add new
Step 3:
➢ Input Peer URI :
➢ Remote username-
➢ Password-
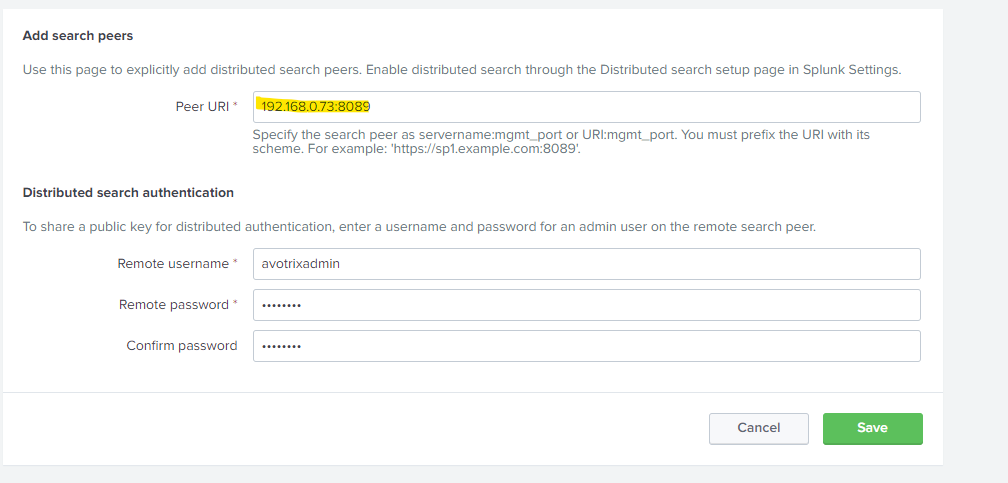
Here we are adding indexer Uri , username and password
➢ Click save
Successfully saved the search peers.
Step 4: Go to Search head UI
➢ Setting >> distributed search >> search peer
You will see your indexer configured as search peer

Congratulation your Splunk instance has been configured as an Search head and is now able to return query and create knowledge objects as per your requirement provided you have installed a heavy forwarder/universal forwarder and an indexer.
If you are still facing issue regarding splunk search head installation and configuration Feel free to Ask Doubts in the Comment Box Below and Don’t Forget to Follow us on 👍 Social Networks, happy Splunking >😉


