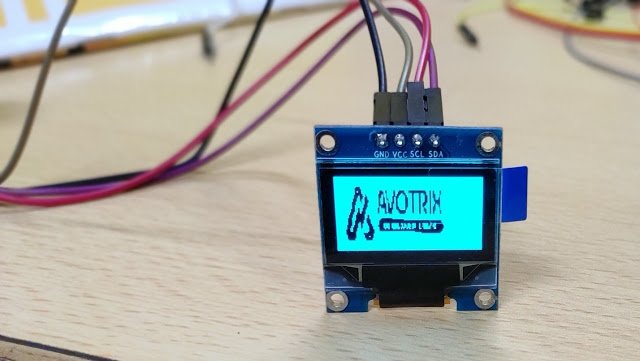
The OLED module shown in the above image is a very popular module available in the market. There are many variants of this module available in market, having different resolutions, communication protocol or pixel colors. They do not require backlight since the display creates its own light. Hence, they consume less power. Both I2C and SPI based OLED modules are available in market.
In the blog that is oled graphic display interfacing with nodemcu we will be looking at, how to display an image on OLED.
Hardware Requirements:
- NodeMCU
- Connecting Wires
- 0.96OLED
- USB Cable
Software Requirement:
- Arduino Ide
- Image to bitmap code convertor(https://javl.github.io/image2cpp/)
PIN DIAGRAM:
 |
| Interfacing OLED Display with NodeMCU |
CONNECTION:
NodeMCU OLED
GPIO5 SCK
GPIO5 SDA
VCC VCC
GND GND
Installing SSD1306 OLED Library – ESP826:
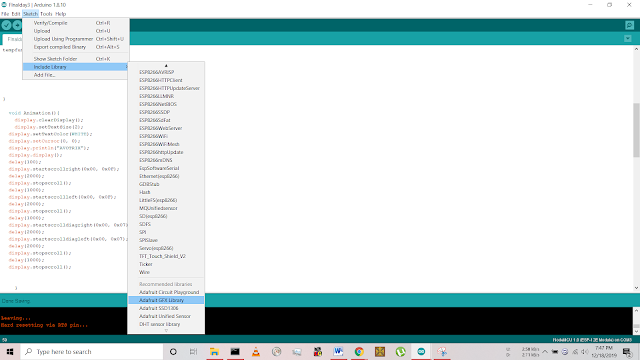
1. Open your Arduino IDE and go to Sketch > Include Library > Manage Libraries. The Library Manager should open.
2. Type “SSD1306” in the search box and install the SSD1306 library from Adafruit.
3. After installing the SSD1306 library from Adafruit, type “GFX” in the search box and install the library.
Testing OLED Display with ESP8266:
After installing the necessary Library, we should be able to include the Adafruit GFX Library and Adafruit SSD1306 Library.
Converting Image to Adafruit_GFX Bitmap Code:
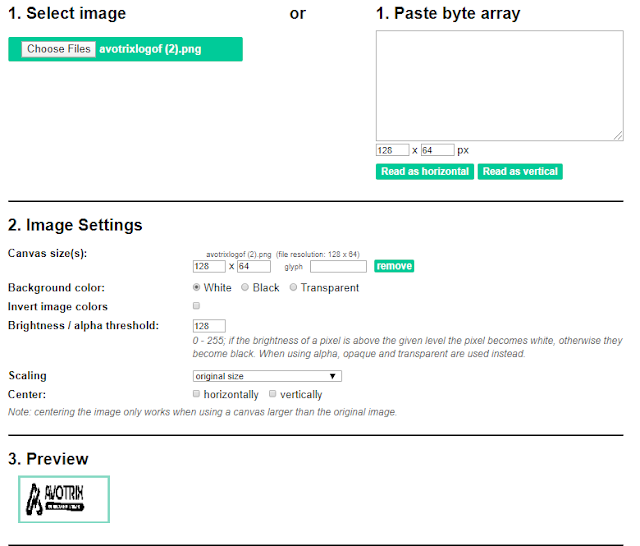
Step 1: Go to https://javl.github.io/image2cpp/ and Select the image logo of size 128*64 size Pixel
Image Logo:
Step 2: Add the image to imagetocpp file and choose the appropriate settings
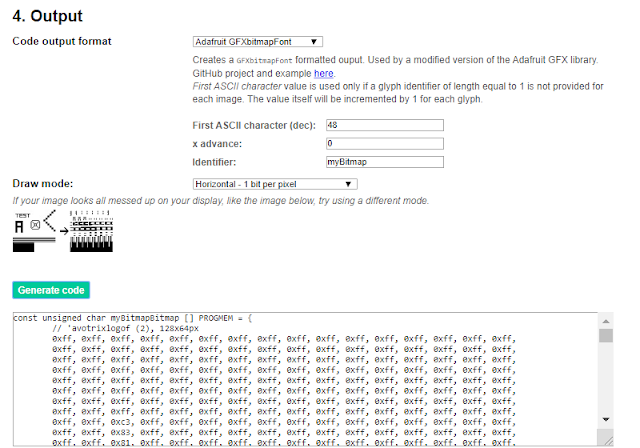
Step3: Generate the Adafruit_GFX Bitmap Code
Step4: Add the code in your Arduino code as shown in our below code.
Source code:
This Program shows how we can Display a simple text, Animated Text and Images on 0.96OLED interfacing NodeMCU.
If you are still facing issue regarding oled graphic display interfacing with nodemcu Feel free to Ask Doubts in the Comment Box Below and Don’t Forget to Follow us on 👍 Social Networks😉

