

Here we will focus on OTA via Arduino IDE.
Note: OTA is not supported on chipset with 512KB of space.
OTA can be done using: –
- Arduino IDE
- Web Browser
- HTTP Server
ota updates arduino Prerequisite: –
- Arduino ID and ESP8266 to be in the same network.
- Arduino IDE 1.6.7 or its newer versions- https://www.arduino.cc/en/Main/Software
- Arduino core for ESP8266 Wi-Fi___33 chip. ESP8266/Arduino platform package 2.0.0 or newer
- For instructions follow https://github.com/esp8266/Arduino#installing-with-boards-manager .
- This project brings support for ESP8266 chip to the Arduino environment.
- Python 2.7 (python 3.5 not supported) – https://www.python.org/
Note: Windows users should select “Add python.exe to Path” while installing python 2.7
- An ESP8266 Wi-Fi module described in A Breakout Board for ESP 8266 ESP – 12E is available at ESP8266 ESP-12 Breakout
Let’s start:-
1. Connect your ESP8266 to your computer with a USB cable
2. Uploading Basic OTA.ino with serial communication

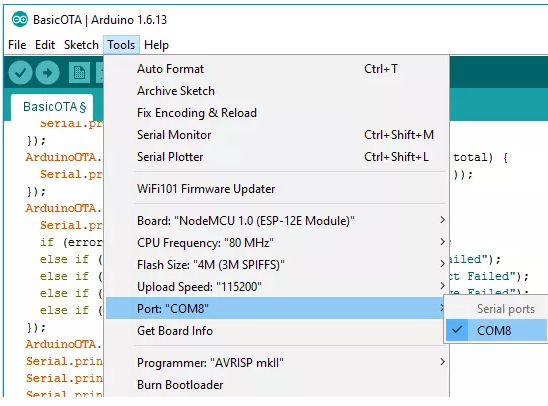
3. Go to Tools to select your ESP board model. You also need to choose your ESP’s COM port
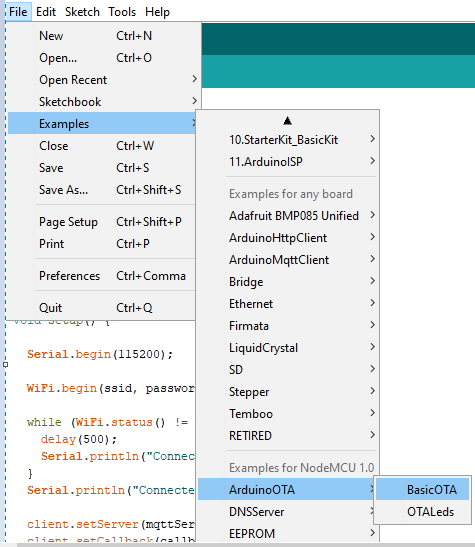
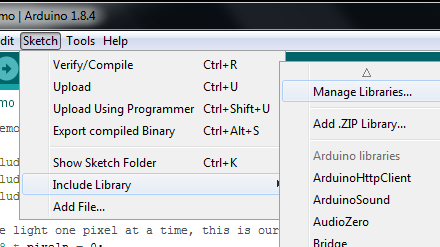
4. Open Arduino IDE and select Basic OTA sketch at File > Examples > ArduinoOTA > BasicOTA
NOTE:- you need to change the sketch example with your SSID and password. (e.g. SSID- XXXXXX, Password-XXXXXXXXX)
5. Press the “Upload” button in the Arduino IDE and wait for the “Done uploading” message.
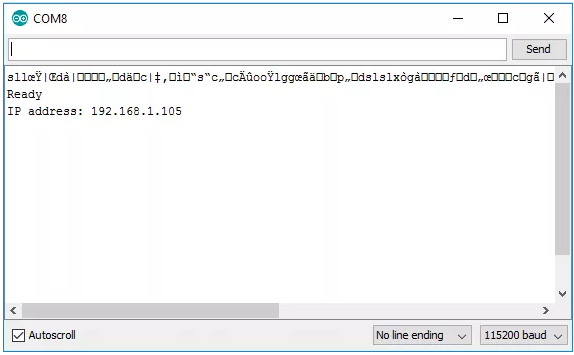
6. Open the Arduino IDE serial monitor at a baud rate of 115200. If you’ve entered the right network credentials you should see your ESP IP address after a few seconds.
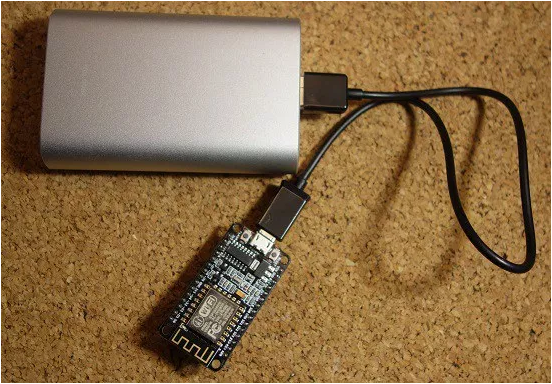
7. Uploading New sketch over the Air (OTA): -Now your ESP8266 is ready to receive OTA firmware updates. You can unplug your ESP8266 from your computer and power it through any power source (for example a power bank). If your ESP8266 has a wireless connection to your router, you should be fine to upload new firmware.
8. Go to your Arduino IDE. Open Tools tab select the Port option and you should see something like this: esp8266-xxxxxx at your_esp_ip_address.

9. Copy the following sketch to your Arduino IDE and upload it to your ESP8266. This sketch blinks the ESP12-E NodeMCU kit built-in LED every second.
Source code:-
10. Press the “Upload” button in the Arduino IDE and wait for the “Done uploading” message.
11. Your ESP should have its built-in LED blinking every second.
Code Explanation:-
1) Include all dependent file for OTA
- #include<ESP8266WiFi.h>
- #include<esp8266mdns.h>
- #include<WiFiUdp.h>
- #include<ArduinoOTA.h>
2) Set network credentials
- const char* ssid = “XXXXXXX”;
- const char* password = “XXXXXX”;
3) Setup Wi-Fi connection
- void setup() {
- Serial.begin(115200);
- Serial.println(“Booting”);
- WiFi.mode(WIFI_STA);
- WiFi.begin(ssid, password);
- while (WiFi.waitForConnectResult() != WL_CONNECTED) {
- Serial.println(“Connection Failed! Rebooting…”);
- delay(5000);
- ESP.restart();
- }
4) ArduinoOTA.onStart function will check the file type, download the sketch, change the pointer of the pointer and reset.
- ArduinoOTA.onStart([]() {
- String type;
- if (ArduinoOTA.getCommand() == U_FLASH)
- type = “sketch”;
- else // U_SPIFFS
- type = “filesystem”;
- // NOTE: if updating SPIFFS this would be the place to unmount SPIFFS using SPIFFS.end()
- Serial.println(“Start updating ” + type);
- });
- ArduinoOTA.onEnd([]() {
- Serial.println(“nEnd”);
- });
5) OTA.onError function gives the types of error occur during the flashing of code
- ArduinoOTA.onError([](ota_error_t error) {
- Serial.printf(“Error[%u]: “, error);
- if (error == OTA_AUTH_ERROR) Serial.println(“Auth Failed”);
- else if (error == OTA_BEGIN_ERROR) Serial.println(“Begin Failed”);
- else if (error == OTA_CONNECT_ERROR) Serial.println(“Connect Failed”);
- else if (error == OTA_RECEIVE_ERROR) Serial.println(“Receive Failed”);
- else if (error == OTA_END_ERROR) Serial.println(“End Failed”);
- });
6) OTA begin function will start executing OTA functionality
- ArduinoOTA.begin();
7) In the loop function OTA Handle function handle obtained from esp_ota_begin. This will continuously chech for the OTA request.
- ArduinoOTA.handle();


