In this blog we are going to learn a simple trick by using which we can Add Reset Button in Splunk Dashboard Panel to clear all the tokens in a single click. We are simply going to make some changes in our XML code. So what are waiting for let’s begin.
First step would be to make sure the dashboard we created is visible in our storage. So, we are going navigate to the location where the dashboard source code is stored:
“$SPLUNK_HOME/etc/apps//local/data/ui/views”
As you can see in the below image a dashboard named “drilldown” is visible.

If you can’t see your dashboard in the location mentioned above then don’t worry, we are going to walk through the procedure step by step.
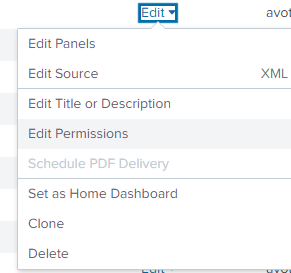
Go to the Dashboard section and click on edit and then select Edit permission.

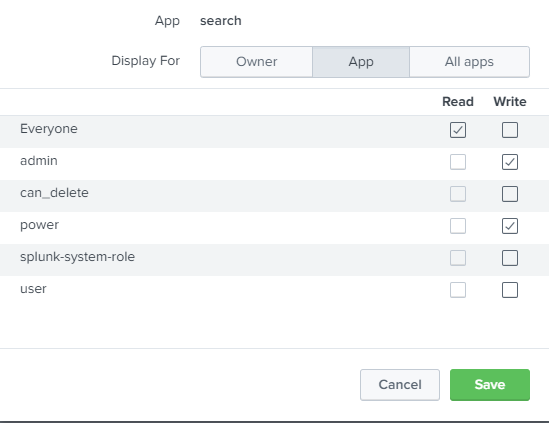
Now click on “App” and allocate permissions as shown below:

After following the above steps go to the location mentioned earlier, your dashboard should be visible. Now add the following code in your Dashboard source.
<row>
    <panel id="reset">
      <html>
        <style>
          <!--  you can change these CSS styling according to your need -->
          #reset .panel-body { padding:0 !important; }
          #reset{
          width:66px !important;
          float: right;
          position: relative;
          top: -68px;
          }
        </style>
        <div>
           <a class="btn btn-primary" href="/app/search/drilldown>Reset</a>
            <!—The highlighted part is the location of our dashboard. The class btn & btn-primary
                     is the class name used in the submit button. In the href attribute you can add any
                     link that you want to go when the button is clicked. If you want to open it in a new
                     tab, then add target=”_blank” attribute in the anchor tag(<a>). -->
        </div>
      </html>
    </panel>
</row>
You can see the final output that I have added in a Dashboard as shown below:

If you are still facing an issue regarding How to Add Reset Button in Splunk Dashboard Panel. Feel free to Ask Doubts in the Comment Section Below and Don’t Forget to Follow us on 👍 Social Networks. Happy Splunking 😉


