
.bash_history files into Splunk, configure proper permissions, and make sure the data is readable and structured — all while keeping it secure and accessible.🧭 Objective
Enable the Splunk Universal Forwarder (typically running as splunk or splunkfwd) to read .bash_history files from all user accounts, including root, and ingest them into Splunk with clean parsing and field extractions.
✅ Step 1: Grant Read Access to .bash_history
Login as root:
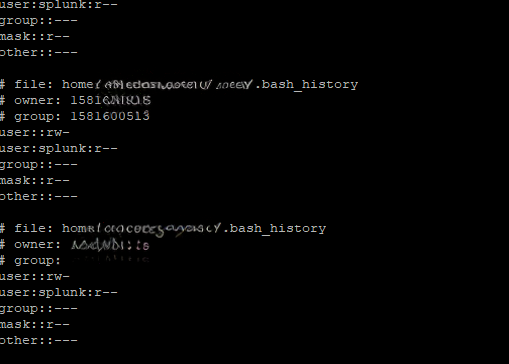
First, make sure the user running Splunk has read access to all users’ .bash_history files.

splunkfwd user.You should see that splunkfwd (or your Splunk user) has r-- permission.
👤 Step 2: Switch to the Splunk User
Switch to the user that runs Splunk (usually splunk):
This ensures you perform the following configuration changes in the right environment.
🛠️ Step 3: Monitor .bash_history Files with inputs.conf
Navigate to the TA (typically Splunk_TA_nix) and create or edit the inputs.conf file:
vi inputs.conf
disabled = false
index = os
sourcetype = bash_history
[monitor:///root/.bash_history]
disabled = false
index = os
sourcetype = bash_history
🧩 Step 4: Configure Field Behavior in props.conf
Now edit or create props.conf in the same folder:
BREAK_ONLY_BEFORE = #(?=\d+)
CHARSET = UTF-8
NO_BINARY_CHECK = true
SHOULD_LINEMERGE = true
TIME_FORMAT = %s
TIME_PREFIX = ^#
category = Custom
disabled = false
REPORT-bhist = bash_user,bash_user_root
FIELDALIAS-dest_for_history = host as dest
EXTRACT-command = #\d+\n(?<bash_command>[\/\w\-\s]*)
.bash_history.🧪 Step 5: Add Field Extractions in transforms.conf
Now let’s extract usernames based on the file paths. Create or edit transforms.conf:
SOURCE_KEY = source
REGEX = ^/home/([^/]+)/
FORMAT = user_name::$1
[bash_user_root]
SOURCE_KEY = source
REGEX = ^/(root)/
FORMAT = user_name::$1
🔎 These stanzas help label each command with the correct user (including root).
🔁 Step 6: Restart Splunk
Apply your changes by restarting Splunk from the Splunk user:
⏱️ Step 7: Enable Timestamps in .bash_history
Timestamps make it easier to track when each command was run.
Switch to root and update the bash configuration:
vi /etc/bashrc
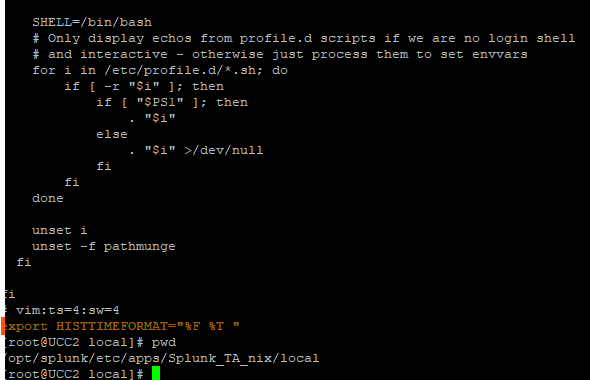
Now, each command logged in .bash_history will include a readable timestamp.
✅ Step 8: Validate in Splunk
Head to Splunk and run this search to check your data:
Verify:
-
Command timestamps (
_time) -
Extracted
bash_command -
Correct
user_namefield
🧠 Final Thoughts
.bash_history into Splunk, you’re not just ingesting logs — you’re enabling deep visibility into user activity, command behavior, and potential anomalies on your systems. It’s a low-cost, high-impact addition to your security monitoring stack.| Happy Splunking 😉